• Showing posts with label Homemade. Show all posts

    The Kitchen: Pantry

    Saturday, March 29, 2014


    ~

    With the official start to Spring, I hope each of you are feeling some vim to lighten up and clean out stagnant parts of your home.

     Though spring weather has not arrived in our part of the world, as a family we spent spring break on the west coast of Canada, surrounded by sea and spring blossoms, it was hard coming home to a few feet of snow and ice-icicles hanging from our eves yet a week of west-coast spring did infuse beauty and eagerness for this next season in my heart and home.

    This week I cleaned and brightened up our school room, to help give a fresh start to our last term in school, Roger brought home daffodils to cheer up the school room which helps me look forward to heading back to school and teaching, we have ten weeks of planned schooling left, which is exactly how many weeks until my wee one is due to be born!

    Spring has a way with me, getting me focused to wrap up the projects of winter, like school, pregnancy and extra house work, so as to give way to the few months of beautiful drawn out summer days.

    And for a little show of my own 'spring' in my home my recently updated, cleaned out, organized pantry!

     I have a closet pantry, it is a lovely addition to my kitchen. Because it is on the smaller side I need to use this space intently and keep it organized or else it will not work for my size family!

    I do have extra shelves in our basement to hold the bulk of our food that we purchase in large quantities. I employ my Mothers pantry organization method. I store all the bulk foods down stairs and refill jars on the main floor as needed, this also works for canned goods, I just keep a can/jar or two upstairs and restocking the pantry shelves as needed. The light, bright organized and functional pantry this has become is truly a time saver and blessing to me and my busy household.
    ~
     
     
    ~
    On the door of the pantry I have wire shelving, this holds all the quart size canning jars, in the jars I have dry goods that are least used in my kitchen. On the bottom shelf I have our families water bottles which is the only 'cups' we use during the day (saves time and dishes) it is at kid level and each child can hydrate as needed.
    ~
     

    ~
    I will explain each shelf of the pantry from top to bottom.
    The top shelf is host to the treats! Candy, cookies, wine...
    ~

    ~
    Second to top shelf is the snacks. One bin has the chips and crackers. The other bin has the snacks, we mostly use these for food in the car, granola bars, fruit purees, all other 'snackies'. I also keep my vintage cookie tin on this shelf, I will store any home backed cookies or muffins that I have made for the week.
    ~
     
     
    ~
    Third shelf, stores my largest jars, they are gallon size pickle jars. In these I store the dry goods we use most frequently. Rice, sugar, oats, flour and my pregnancy tea. On this shelf I have a basket for my special foods.
    ~


    ~
    Next shelf down has two-gallon jars, there are fourteen jars, two lines of seven jars each. Each jar has more dried goods, nuts, noodles, and all the in-betweens.
    ~
     
    ~
    Last shelf, has the canned goods, the oils, my protein and any bottles.
    ~

     
    ~
    On the floor of the pantry I have three baskets, one for cereal, another for root vegetables, and another for fruits.
    ~

     
    ~
    This is my pantry!

    The most important things for me is that all my food is visible and accessible.    

    Here is the list of where I bought my pantry organization supplies.

    Large white baskets are from IKEA

    Black wire baskets are bought at Winners

    Large pickle jars have been collected from thrift shops.

    Two-liter jars (Bernard Brand) are from Canadian Tire

    One-liter jars (Bernard Brand) from Canadian Tire

    White canning jar lids (Bernard Brand) Canadian Tire

    Chalk labels and Green Labels (both Martha Stewart Brand) are purchased from Staples

    The little chalk labels I have hanging on the white baskets these were purchased at Michaels.

    ~


    'Command' Center

    Thursday, February 13, 2014


    ~
    It's the weekend... you see Roger has tomorrow off which means I am starting weekend time a day early!
     Right now I am enjoying a few precious afternoon moments with the sun streaming through the windows, babies napping, laundry is done, house is cleaned and dinner is slow cooking.
     There is something about this time of year or could it be this stage of pregnancy that fills me with new vision and desires for my home. I am blessed to be living in my
    House of Dreams,

    yet there seems to always be spaces, corners and cupboards that can use a clean or overhaul. One such area that I am constantly trying to figure out is my kitchen, as our family grows and the needs change I am altering things to make life smother and more efficient.
    ~

    ~
    Recently I have moved our 'command cupboard', you may remember it from This Post. I loved this space, which was located in the kitchen and just above the phone, yet I needed more kitchen cupboard space, for kitchen things.
    We have this narrow hallway leading from the kitchen up to our 'gabled schoolroom' (open doorway on the left in the above photo). The hallway has a wall of build-in cabinets and a small utility sink. I have always been a bit at loss of how to utilize and decorate this narrow space, until I saw this bookshelf with doors at Ikea. I knew instantly what to do with the shelf and the hallway!
    ~
     
     
    ~
    I moved our family command center to the hallway, I like how it looks and it's functionality along with how it bridges the space between kitchen and school room. It provided more room to organize our mail, calendars, phones, keys, cameras, general daily paper and schedules. On the wall space left of the shelf I framed our family rules, then a cheap plastic frame from Ikea inside I placed brown paper and wrote the days of the week. On the outside of the frame I write the day's most important requirements with a chalk pen, I can easily wipe it off and reuse the fallowing week. Putting the shelf and using it as our command center in the hallway opened up a large cupboard and two small drawers in the kitchen which was very much needed.
    ~


    ~
    There are three sections in the cabinets that were all ready in the hallway. In the first section right beside the utility sink I have our cleaning supplies. I mostly clean with Norwex cloths and hot water. I have a place to hang our daily 'cleaning cloth' on hooks inside the cabinet, this way we can reuse it (other than bathroom or germy jobs) throughout the day, also my kids can get at the cloths (that is why the hooks are hung low). Because we do not clean with chemicals most wiping, dusting, walls and windows can be done by my kids, I also help, but I love to delegate!
    ~

     
     ~
    The next section over is our household utility shelf, it holds everything from light bulbs to toilet paper, cloth bags and our going to town bins are at the bottom.
    ~

    ~
     Next section I have my vases, extra decorations, and our baby swing that can be hung in the kitchen, for those wild moments when only a swing will sooth a toddler!
    ~

    ~
    There are three smaller cupboards above the cabinets, I use this space for baskets to hold any returns.
     
    ~
     
    ~
    I am enjoying having a utility command/center space in our home. I like having everything in one place as opposed to scattered in different spots throughout the home.
    I love that it looks lovely!
    ~
    ~
     

    Lunar Phases (A Less Serious Lesson)

    Friday, January 24, 2014


    ~
    I am taking off for warmer weather and coastal air. For the first in my life I am leaving all my babies and husband behind... for a whole week! I will be spending my moments with some of my favorite west-coasters.

    Our school room has been in a flurry of extra projects and pages and a few fun tastes, in preparation for taking a week away from structured learning.

    This moon-phase project was a winner with my students! They all know the Lunar phases and the Latin terms most accurately now, along with the lesser known  vocabulary for the moon cycle using highly intelligent terms such as quarter oreo, or gibbous chocolate! We were driving as a family a few evenings ago and our six year old started explaining in 'cookie' terms exactly what stage the evenings moon was in, my poor engineer husband, he did not know quite how to handle the moment, wondering what exactly goes on in our gabled school-room all day!

    My somewhat hesitant reply was,

    'We were having fun!'
    ~
     

    Herbal Viral Syrup

    Thursday, November 28, 2013


    ~
    It comes to this family with force, five coughing, dripping, flushed, cranky kids. It often heralds it's arrival sometime during the darkest parts of night, you know that restless cry that wakes a reluctant parent  and soothing a little-one will be the fallowing mission of mid-night.
    ~
    ~
     
    And if any of you mama's treat the common winter ills naturally you will know the wild expense of the smallest bottle. The last cold our family had, we were travelling, so I bought a bottle from a natural food store, it took two bottles of this remedy to get all five kiddos back to health. Thirty dollars my friends, for one simple cold!
    ~
     
    ~
     
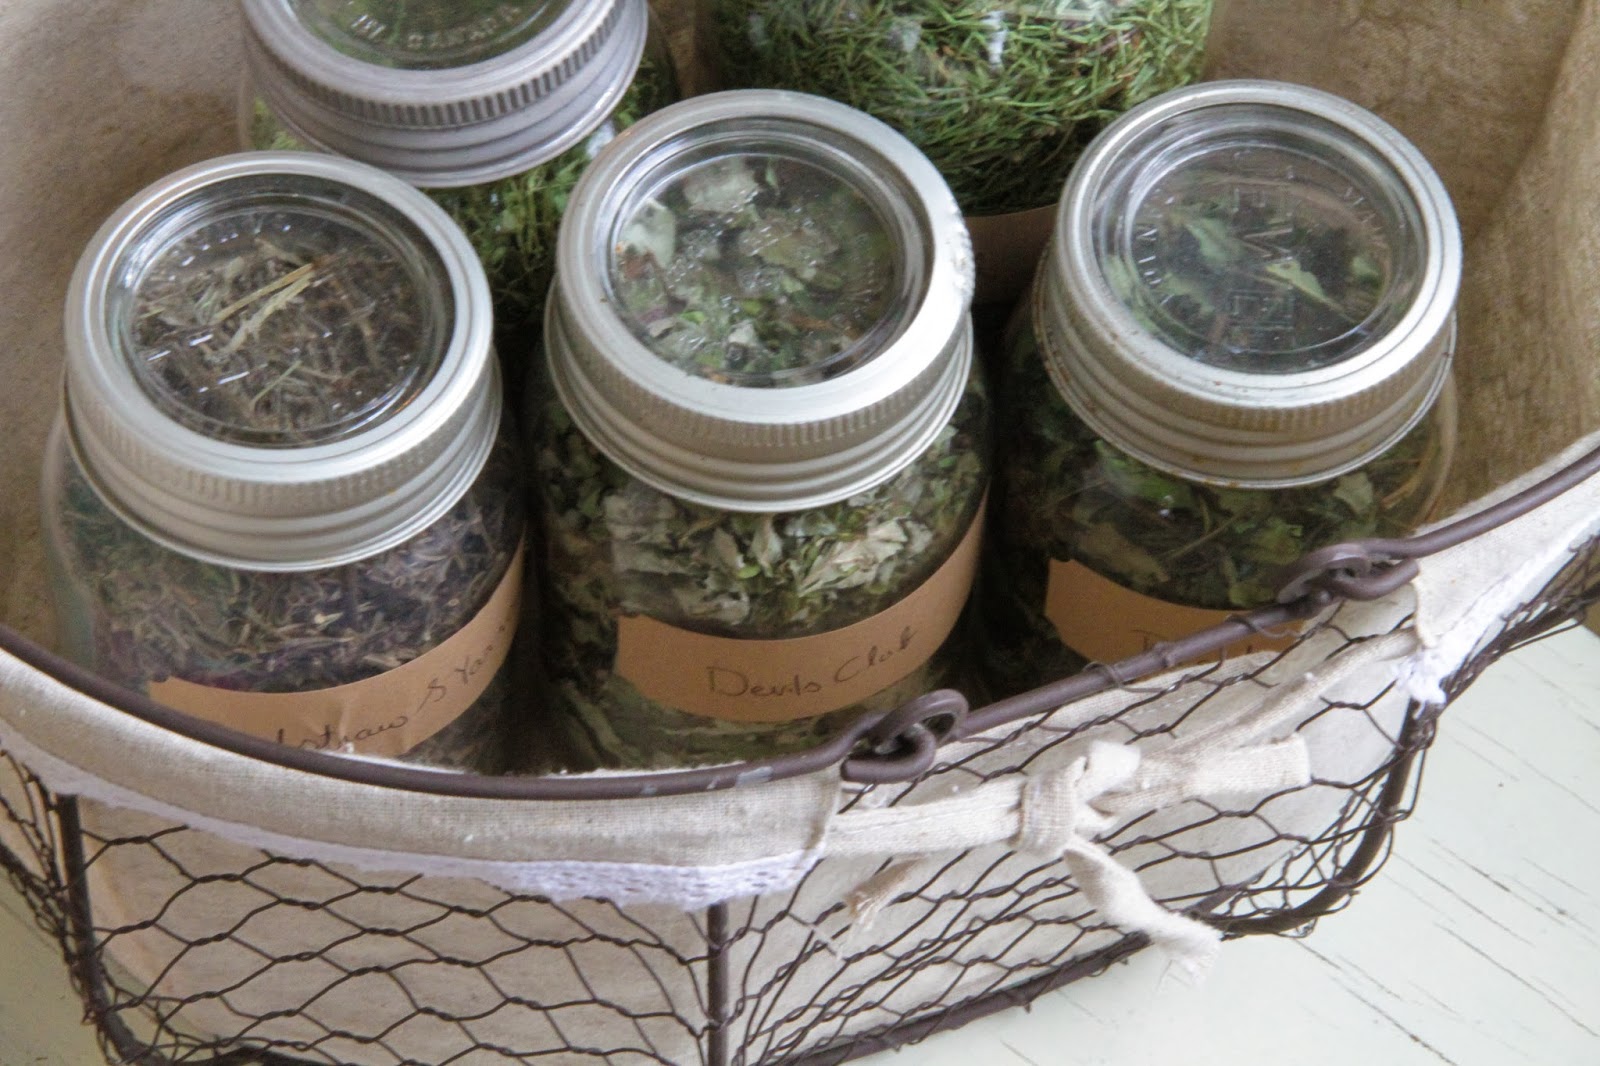
    Once the snowflakes start falling I prepare a  winters worth of herbal remedy. It works for nearly all symptoms, fever, coughing, sneezing, earaches, runny or goopy nose, sore throat, restlessness, immunity builder. It works, and my kids love it, like candy like it. If one of the babies see it in the fridge they will bring it to me and plead for some 'tandy'. It is easy to make, and affordable, two canning jars worth cost me ten dollars. 
    ~
    ~
     I had the pleasure of using some of the herbs I harvested this spring from our woods, which saved some in cost, but most herbs for this recipe is less than half a cups worth, which keeps costs affordable even if the loose herbs are purchased from a health food store.
    ~
    ~
    My children love being involved, Marion did most of the work (while I took pictures) she said after a slow-dramatic inhale that it smelt like winter, she associates the smell of this recipe with the coming of winter.
    ~
     ~
    Herbal Viral Syrup

    1 cup Alder-Berries

    1 cup Rose Hips

    1/4 cup Chickweed

    1/4 cup Dandelion Leaf

    1/4 cup Devils Club

    1/4 cup Sorel

    1/4 cup Bedstraw & Yarrow

    1/4 cup Echinacea Flower

    1/4 cup Echinacea Root

    1/4 cup Astragals Root

    1/4 cup Chamomile Flower

    1/4 cup Elecampane

    1/8 cup Fresh Ginger, peeled and diced

    1/8 cup Cloves

    A few fresh sprigs of Rosemary

    Ten Cinnamon Sticks or 1/8 cup powdered Cinnamon

    Mix all the above ingredients together.

    ~


    ~
     Pour into a sauce pan, cover three times the herbs with water.
    ~


    ~
    Bring to a boil then reduce heat and simmer off the majority of water.
     It will turn dark, once the herbs have expanded and the water level is half the size of the herbs (this will take around 4-6 hours, the longer you simmer the more nutrients  will seep from the herbs) remove the herbs from the heat, let cool.
    ~


    ~
     Strain the herbs from the liquid, I use a milk bag but cheese cloth works just as well. Make sure all the little pieces of herbs have been strained out of the liquid. When the liquid is clear of herb particles put back in a cleaned sauce pan, add a shot of whisky or vodka and two cups of honey, bring back to a boil so you simmer off the alcohol, and the honey is dissolved. You may add more or less honey if you prefer, you need enough for a preservative  which works alongside the alcohol, and too add a pleasant taste for your children.  Put in a clean jar, label and place in the fridge. I give a tsp 4-5 times a day to my four years and younger kids and a TBSP 4-5 times a day for my older ones.  This recipe has always lasted me six months before going bad.
    ~
    This recipe is safe for little children, I have seen how quickly my children recover from an illness when taking this recipe compared to battling a cold without.
    ~


    ~
    Enjoy
    ~